Yuqi Jia
Ph.D. Student at Duke University
yuqi.jia@duke.edu
Fingerprint Verification System
This is system I developed as a class project for an introductory Image Processing course during the last year of my undergraduate studies.
The text below summarizes the main processing steps required for verifying if the fingerprint image belongs to a given person. All details are provided in the project report. Also, the slides I have prepared for presentation in class provide a good summary (slightly more detailed than what is given below).
Summary
The process consistis of the following steps:
- Fingerprint Segmentation
- Image Enhancement
- Normalization
- Orientation Estimation
- Frequency Estimation
- Filtering
- Binarization
- Skeletonization
- Feature Extraction (Minutiae)
- Fingerprint Matching
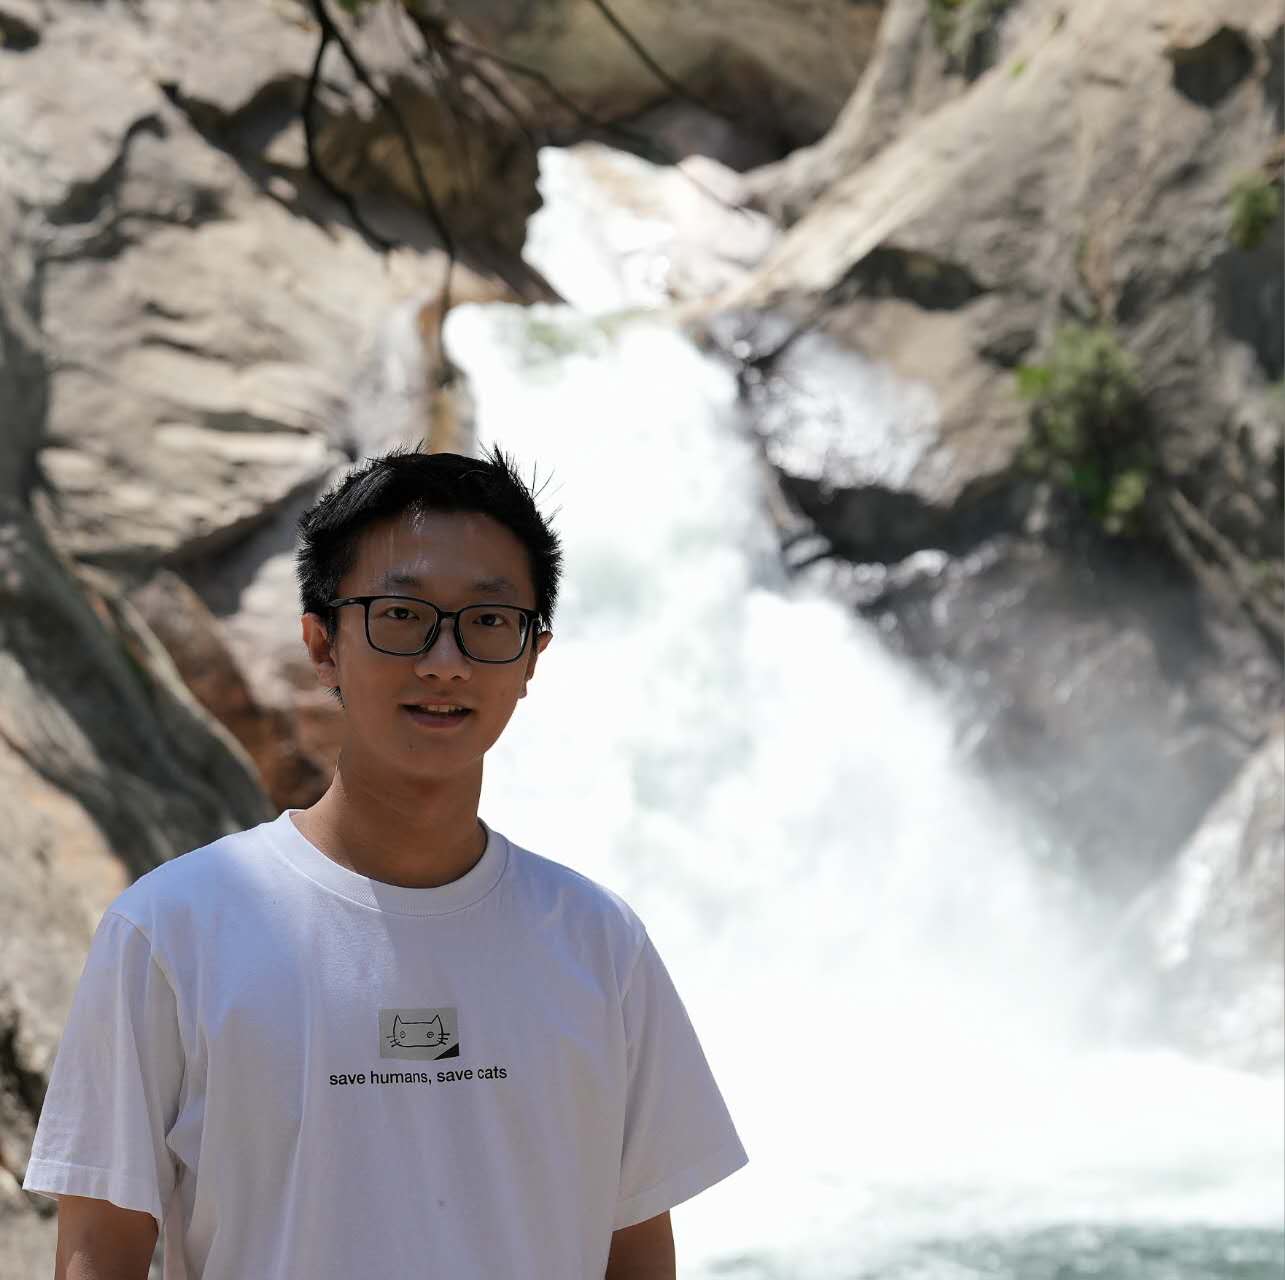
Fingerprint Segmentation
- Separates foreground from background regions
- Fingerprint regions have higher gray scale variance
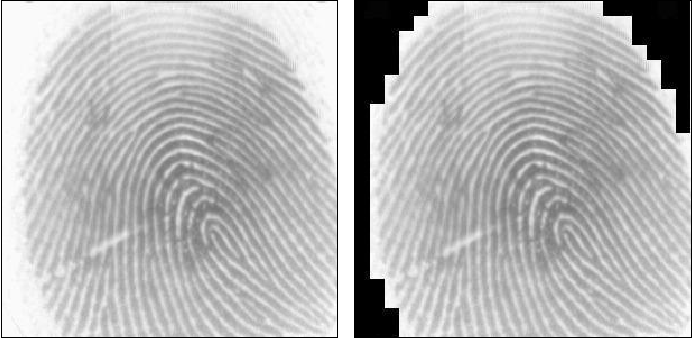
Fingerprint Image Enhancement
The quality of ridge structure of the FP image is essential for successful feature extraction. In this project, we adopt the Gabor filter as it is both frequency and orientation selective. The filtering includes the following steps: (1) Normalization, (2) Orientation Estimation, (3) Ridge Frequency Estimation.
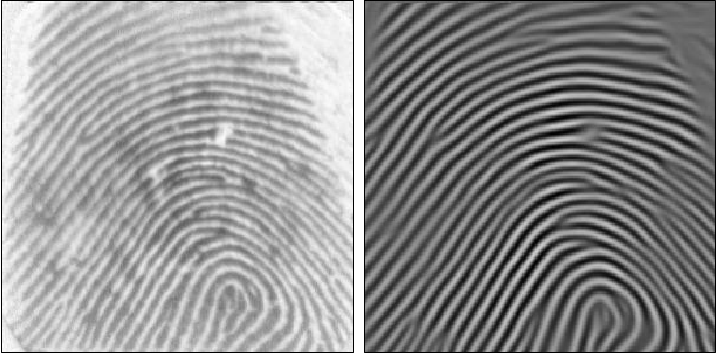
Binarization
Refers to the process of conversion from grayscale to binary images. It is useful step as it improves the contrast between the ridges and valleys.

Skeletonization
Thinning the foreground regions until one pixel wide.
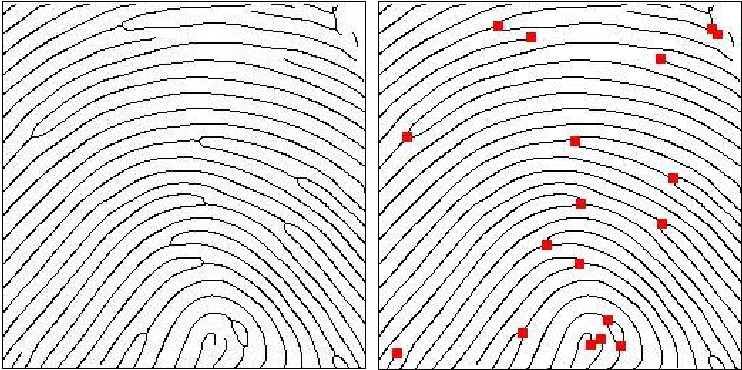
Minutiae Extraction
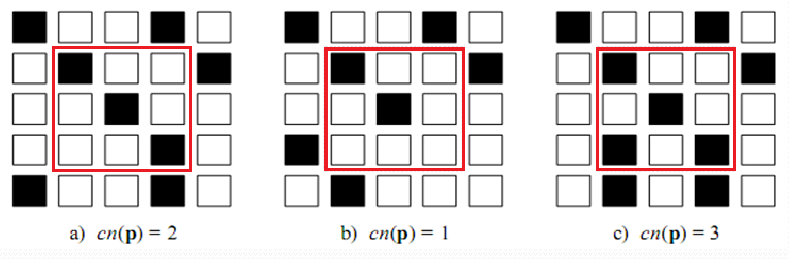
Performed by using the concept of Crossing Number, CN:
\[CN(p) = \frac{1}{2} \sum_{i = 1 ... 8} |val(p_{i~mod~8}) - val(p_{i-1})|\]All minutiae extracted by a simple image scan of the skeletonized image:
- CN = 1, correspond to ridge ending
- CN = 3, corresponds to bifurcation
This is illustrated in the following figure.
All minutiae stored as (\(x\), \(y\), \(\theta\) , \(CN\)) quadruples where — \(x\), \(y\): the spatial coordinates; \(\theta\): orientation; \(CN\): the Crossing Number.
Fingerprint Matching
Determines the degree of similarity between two fingerprint images. Attempts to find the alignment of the images which will result in maximum number of minutiae pairings. Must cope with: displacement, rotation, non-linear distortion, noise.
The matching algorithm adopted consists of 3 steps:
- Registration: finding the best transformation which when applied to the one of the images will result in maximum overlapping minutiae.
- Minutiae Pairing: minutiae are paired if their difference in \(x\), \(y\), \(\theta\) is within the range of the tolerance box.
- Matching Score:
\(m\) – paired minutiae, \(n\) – minutiae within the bounding box.
This website is built with Jekyll using a template by Martin Saveski.